Launch a Google Travel campaign using the Things to Do program
You'll have a live Google Travel campaign targeting your specific activities through the Google Things to Do program.
Follow each screenshot below in order. The whole flow takes about 10 minutes the first time. Make sure Lesson 5 is approved before you start — without the link, the Travel campaign type won't appear.
Step 1 — Click the + 'Create' button
Log into your Google Ads account and press the + in the top left corner labeled 'Create' to start a new campaign.
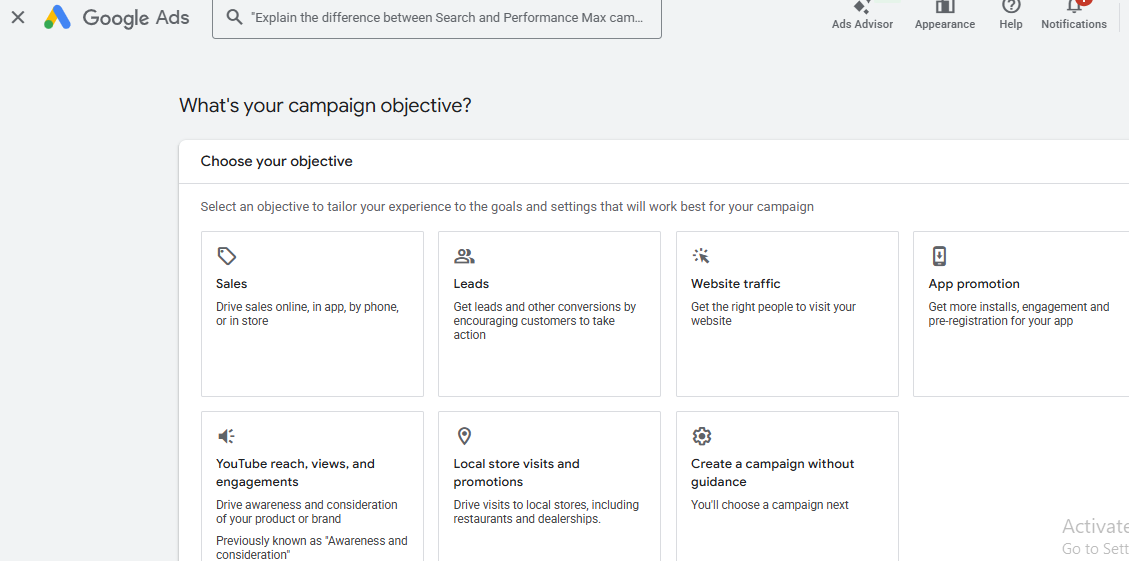
Step 2 — Choose 'Create a campaign without guidance'
On the goal selection screen, scroll down and choose 'Create a campaign without a goal's guidance'. This is the only path that exposes the Travel campaign type.
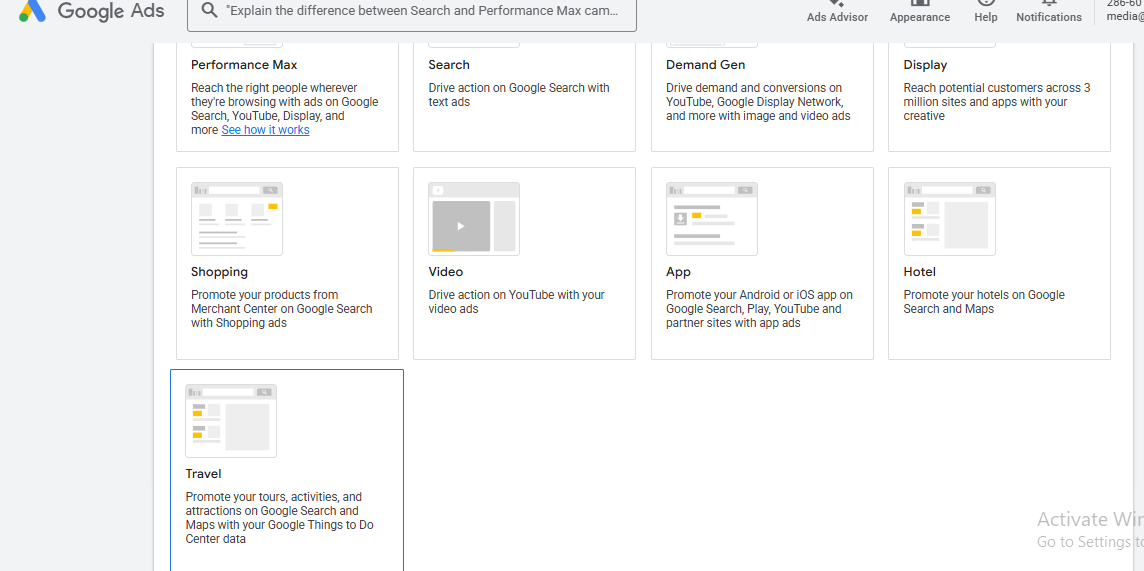
Step 3 — Select 'Travel'
Pick Travel as the campaign type.
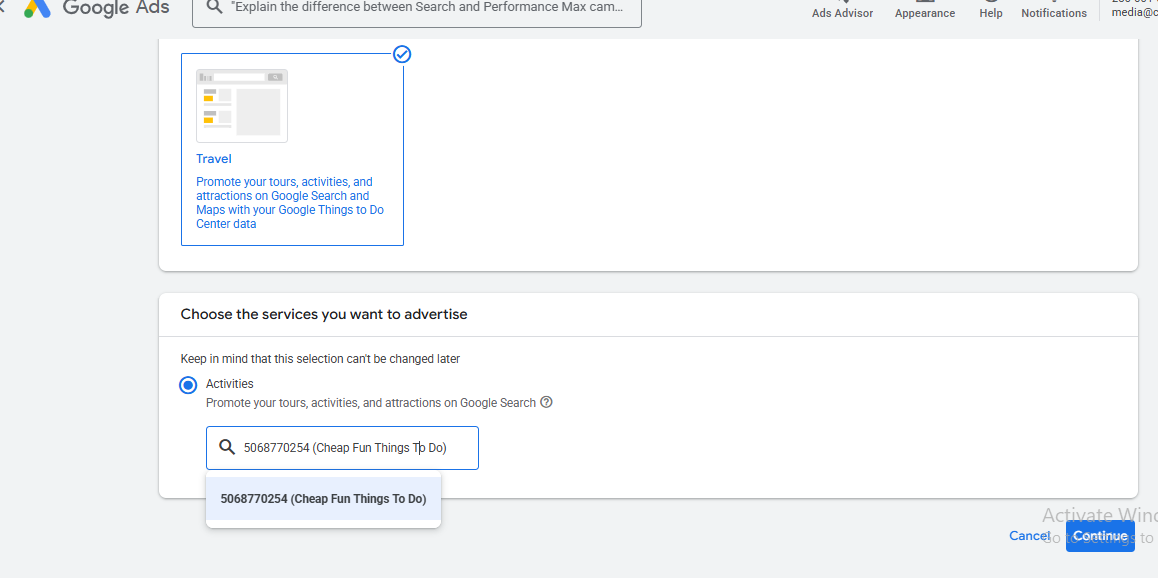
Step 4 — Select activities
On the activity selection screen, choose the activities you want to advertise. These are pulled from your Things to Do feed.
Step 5 — Configure activity settings
Confirm the activity-level settings shown in the screenshot.
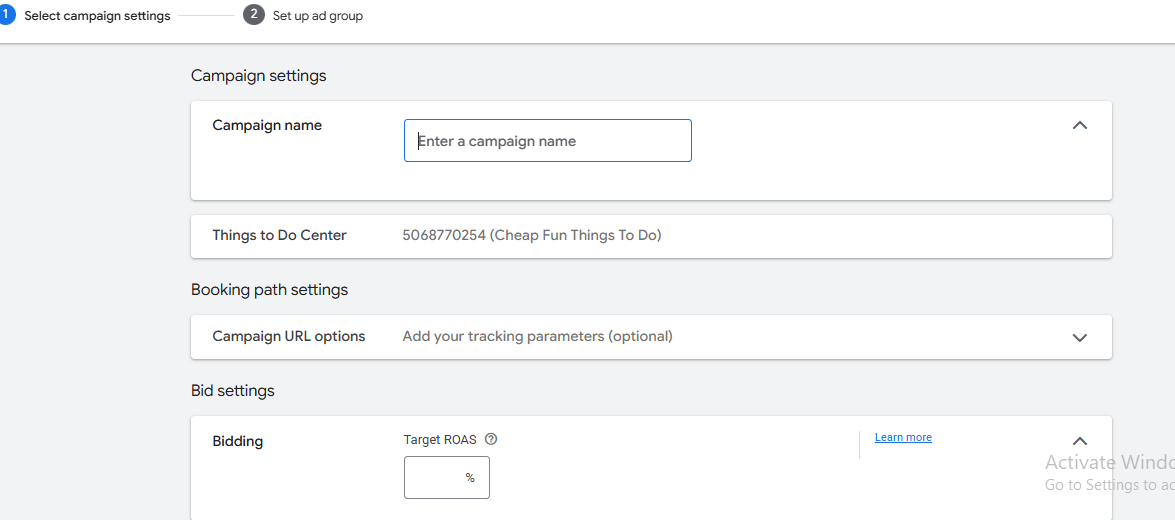
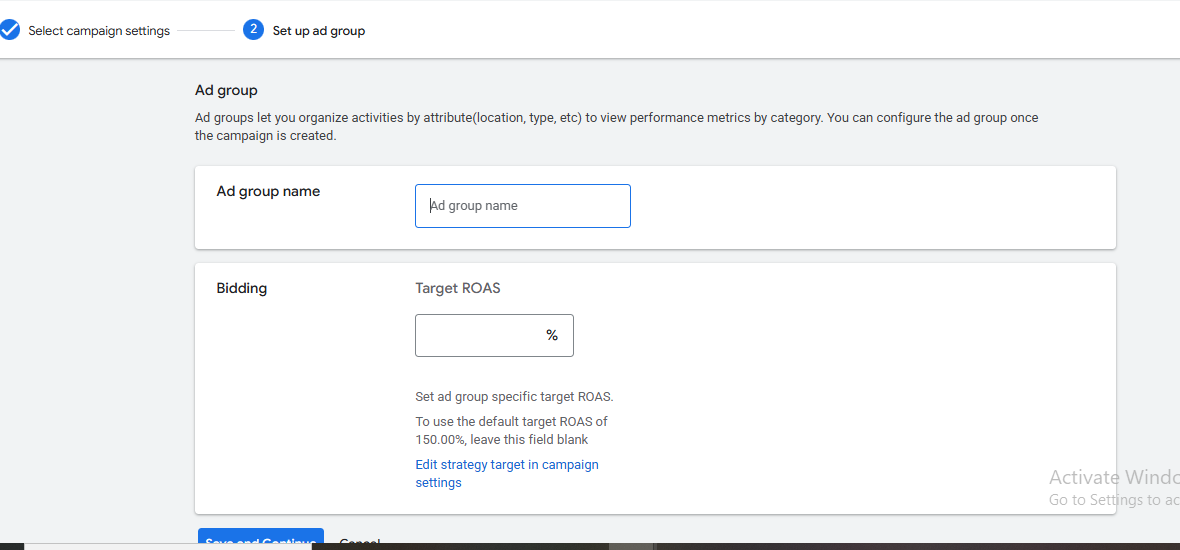
Step 6 — Set bidding
Set your bid strategy at the activity level. Don't bid on keywords — Google matches search intent to your activities automatically.
Step 7 — Budget & schedule
Set your daily budget and campaign schedule. You can start small ($10–20/day) and scale once you see conversion data.

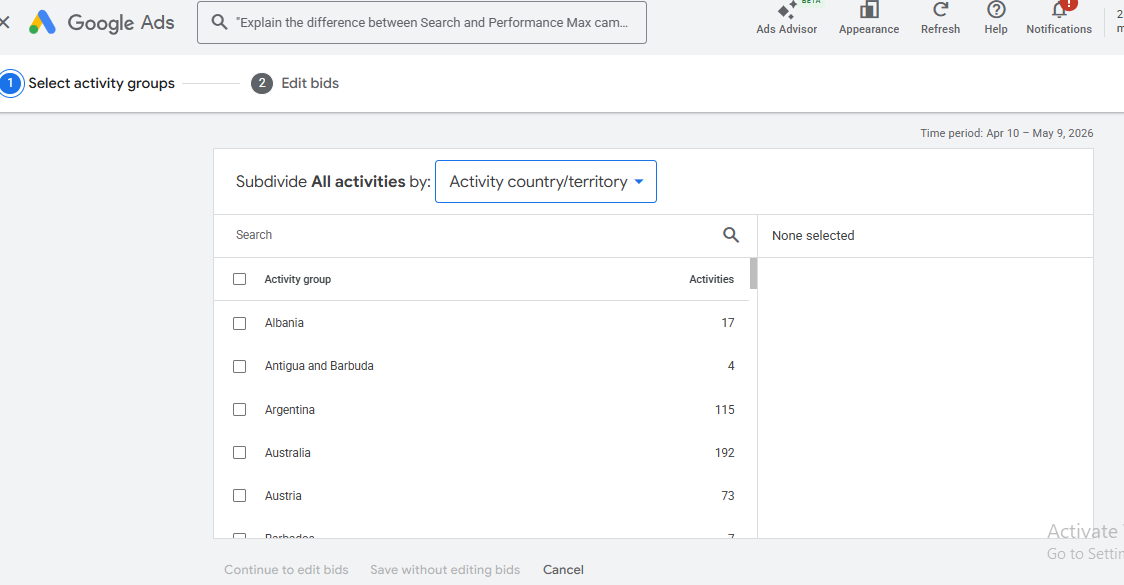
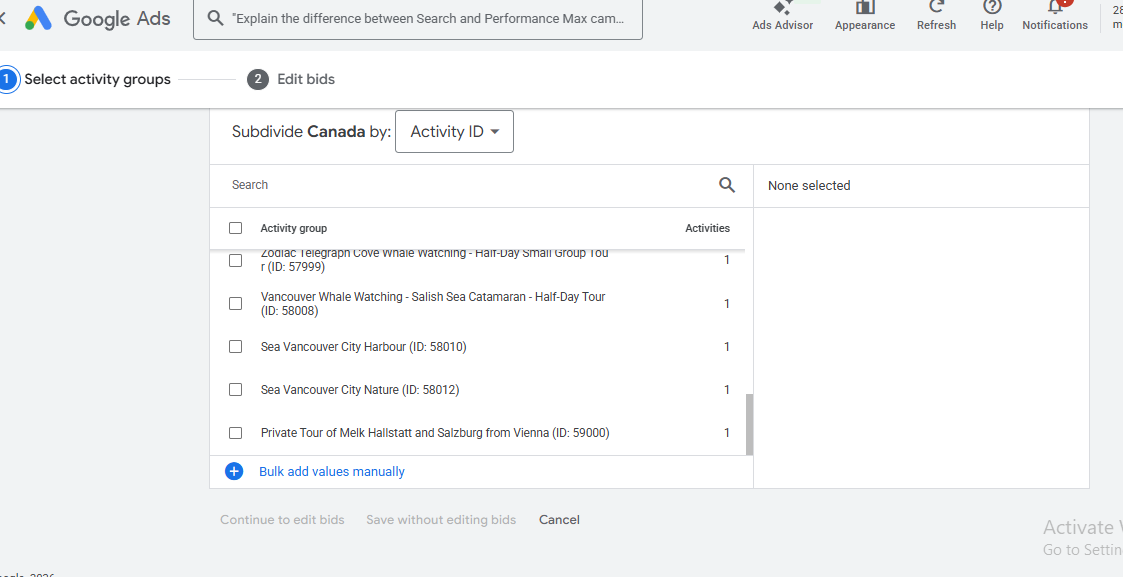
Step 8 — Review activity group
Open the Activity group column. Click the + next to 'Everything else in All activities' and choose 'Activity ID' as the subdivision criteria. Pick the specific activities to advertise, then Continue to edit bids and Save.
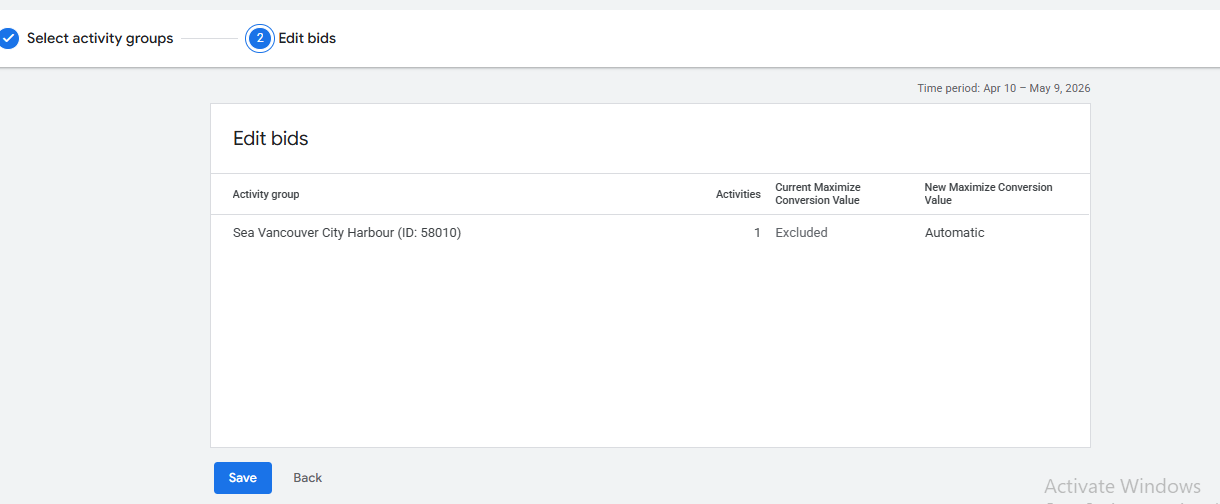
Step 9 — Flip 'Excluded' to 'Automatic'
Next to your subdivision criteria, the status may say 'Excluded'. Hover, click the pencil icon, select 'Automatic', and click Save. Until you do this, the activities won't actually serve ads.
Step 10 — Review and launch
Review the campaign summary, confirm everything matches the screenshot, and click Publish. Your GTTD ads will start serving within a few hours.
Key takeaways
- Always start with 'Create a campaign without a goal's guidance' so Travel appears as an option.
- Subdivide by Activity ID, then switch any 'Excluded' rows to 'Automatic' or your ads won't serve.
- Start with a small daily budget and scale once conversion data comes in.
Previous lesson
5. Link Google Ads to the Google Things to Do program
You finished the course
Back to course overview →
Want this set up for you instead?
We're a Google Connectivity Partner. Setup gets your Official Site badge live on Google Things to Do.